Enhance Your Dashboard - A Guide on Adding Plugins to Your Nuxt.js Web Application
Adding plugins for Graph Charts libraries into your Nuxt.js Vuetify Web Application Dashboard with Chart.js and Apex Charts open source JavaScript library for graph chart data visualization
 Web Story
Nuxt.js Plugins Directory
Nuxt.js has a feature that integrates the plugins directory containing the Javascript plugins that you want to run before instantiating the root Vue.js Application. You can put any of JavaScript library in this directory and set them up to integrate into your Nuxt.js web application ecosystem.
Installing JavaScript Plugins in Nuxt.js
Web applications that have a requirement to add a feature set to their system are more likely to add libraries to their system. Below is an example of a Nuxt.js web application integrated with a free open-source chart library for use in dashboards. The chart libraries used are Chart.js and Apex Charts.
Open your Nuxt.js terminal and type:
Start with Yarn:
yarn add apexcharts vue-apexcharts chart.js vue-chartjs --dev
Or with NPM:
npm install --save apexcharts vue-apexcharts chart.js vue-chartjs
After installation is complete, create a file inside the plugins directory and start initializing the plugins library. Name it ./plugins/apex-chart.js for the Apex Chart and ./plugins/chart.js for the Chart.js libraries.
Import JavaScript Plugins Library
Add Chart.js Library into Nuxt.js pLugin:
Open the ./plugins/chart.js file and start importing Chart.js into Vue components in Nuxt.js:
import Vue from 'vue'
import { Bar, Line, Doughnut, Pie } from 'vue-chartjs/legacy'
import {
  Chart as ChartJS,
  Title,
  Tooltip,
  Legend,
  BarElement,
  CategoryScale,
  LinearScale,
  LineElement,
  PointElement,
  ArcElement
} from 'chart.js'

ChartJS.register(
  Title,
  Tooltip,
  Legend,
  PointElement,
  BarElement,
  CategoryScale,
  LinearScale,
  LineElement,
  ArcElement
)

Vue.component('LineChart', {
  extends: Line
})

Vue.component('DoughnutChart', {
  extends: Doughnut
})

Vue.component('BarChart', {
  extends: Bar
})

Vue.component('PieChart', {
  extends: Pie
})
Add Apex Charts Library into Nuxt.js plugin:
Open the ./plugins/apex-chart.js file and start importing Apex Chart into Vue components in Nuxt.js:
import Vue from 'vue'
import VueApexCharts from 'vue-apexcharts'

Vue.component('ApexCharts', {
  extends: VueApexCharts
})
Next, we will initialize the library into Nuxt.js configuration to load them in the ecosystem when starting the Nuxt.js web application.
Open the nuxt.config.js file and add the plugins file that we added earlier to the plugins section.
export default {
  ...
  // Plugins to run before rendering page: https://go.nuxtjs.dev/config-plugins
  plugins: [
    { src: '~/plugins/apex-chart.js', mode: 'client' },
    { src: '~/plugins/chart.js', mode: 'client' }
  ],
  ...
}
Using the Plugins Library
Since we will use the plugins only on the client side, we need to add mode: client into the plugin's configuration. We also need the plugins rendered on the client side in the pages or components in Nuxt.js. Also, we need to put them in the <client-only> Nuxt.js component.
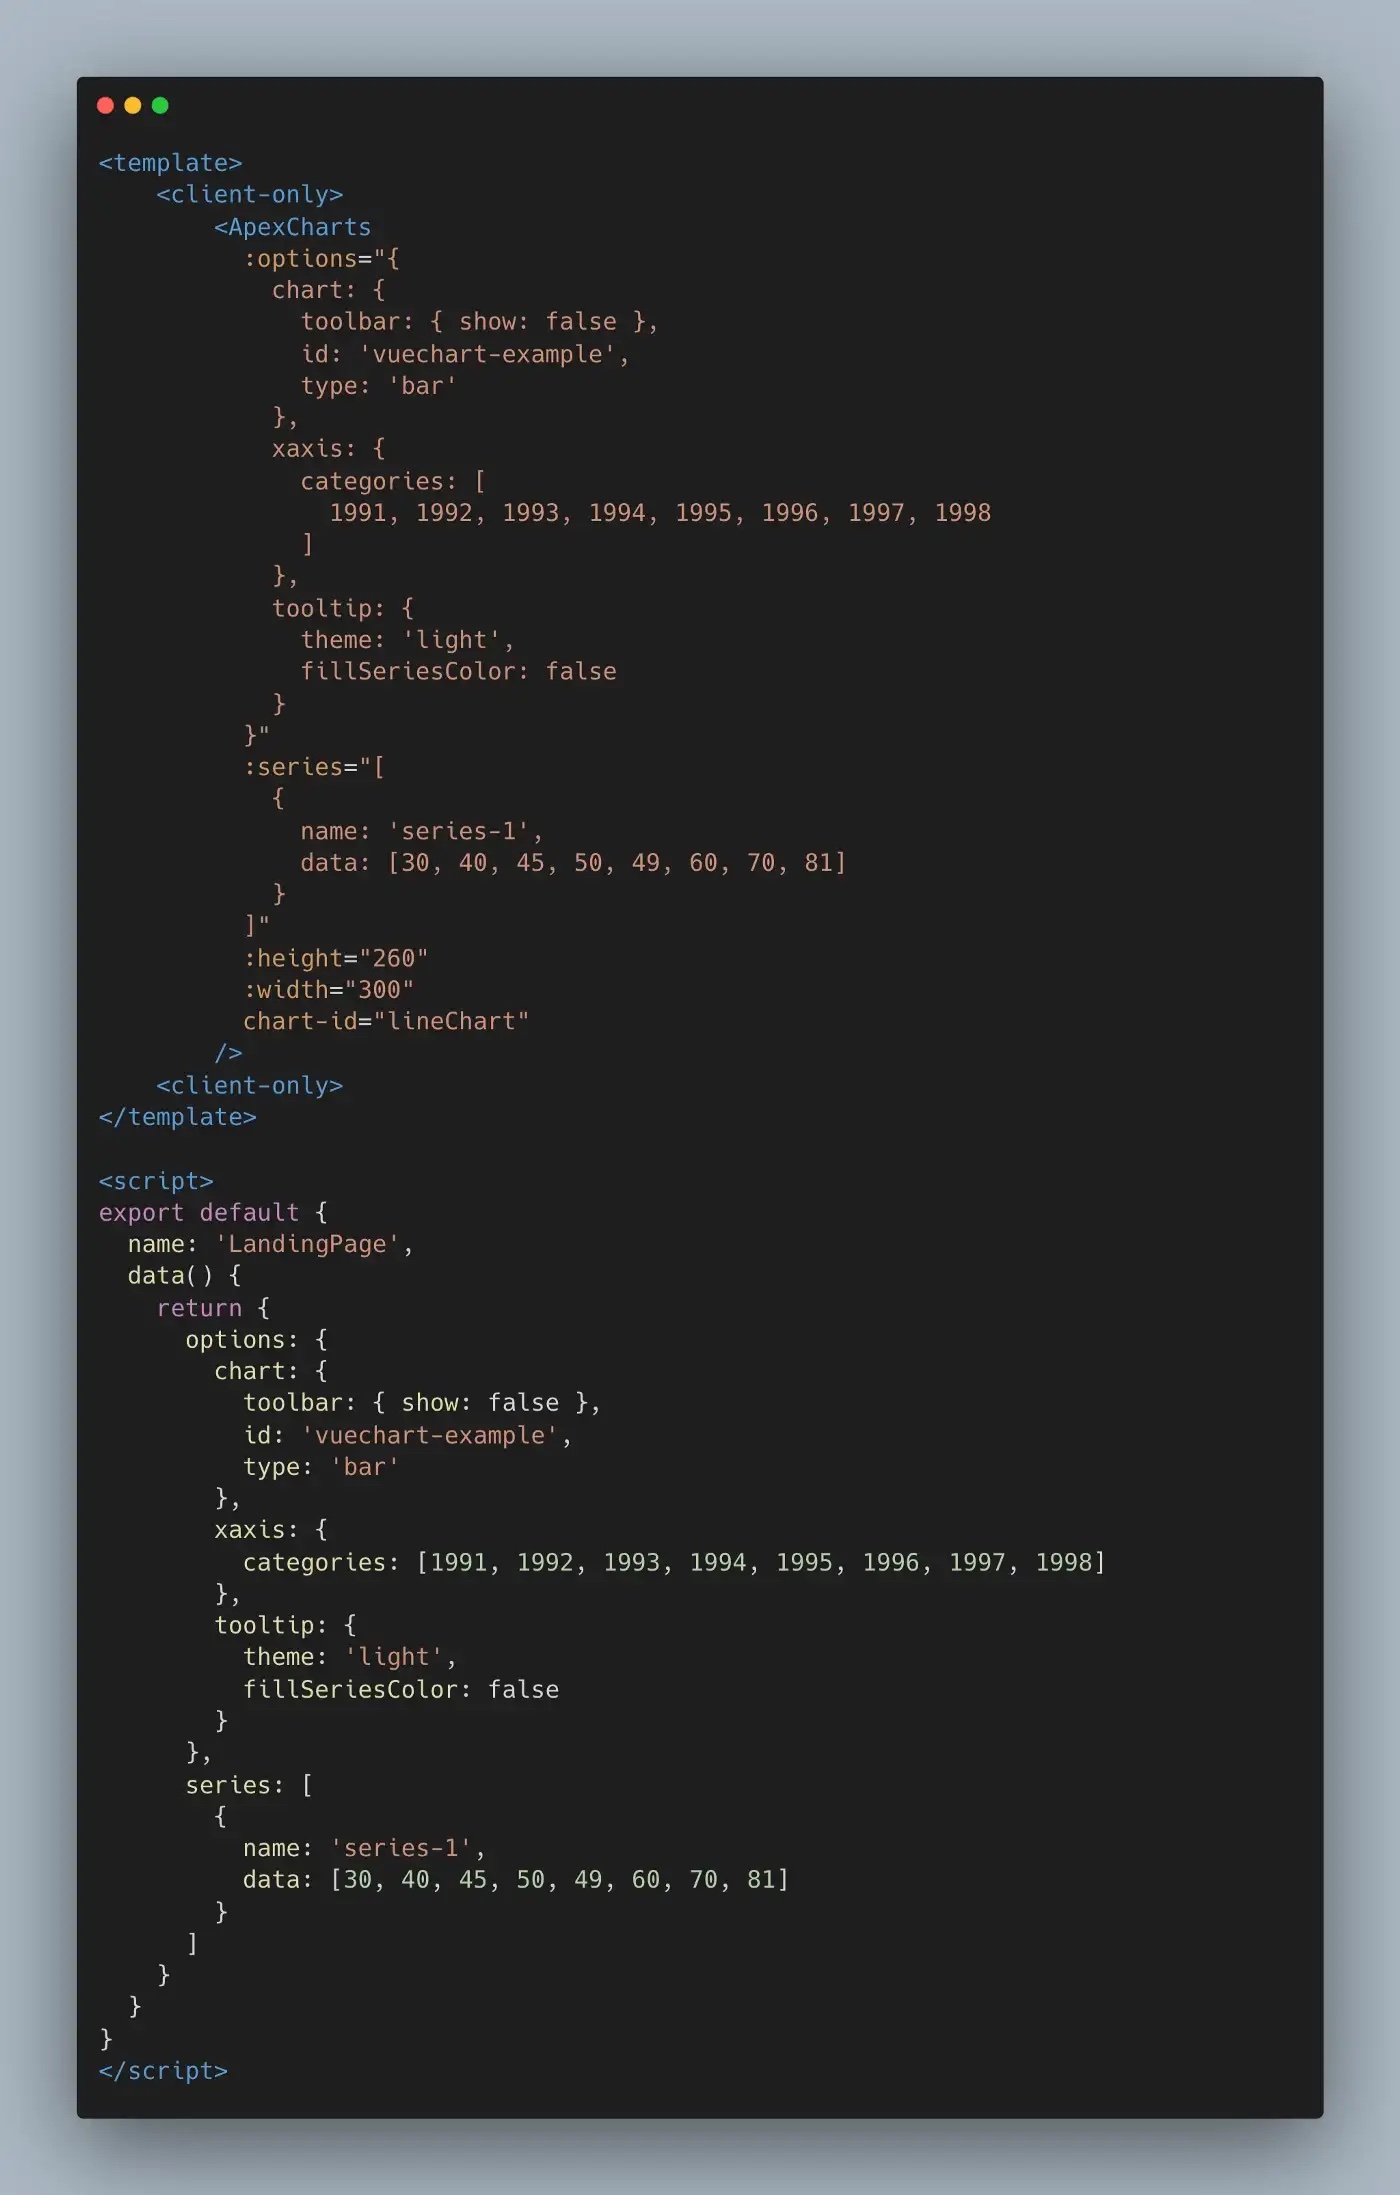
Using Apex Charts in Nuxt.js pages or component:

You can use the Apex Charts in the pages or Nuxt.js components by writing the component name that I already explained above which is <ApexCharts/>.
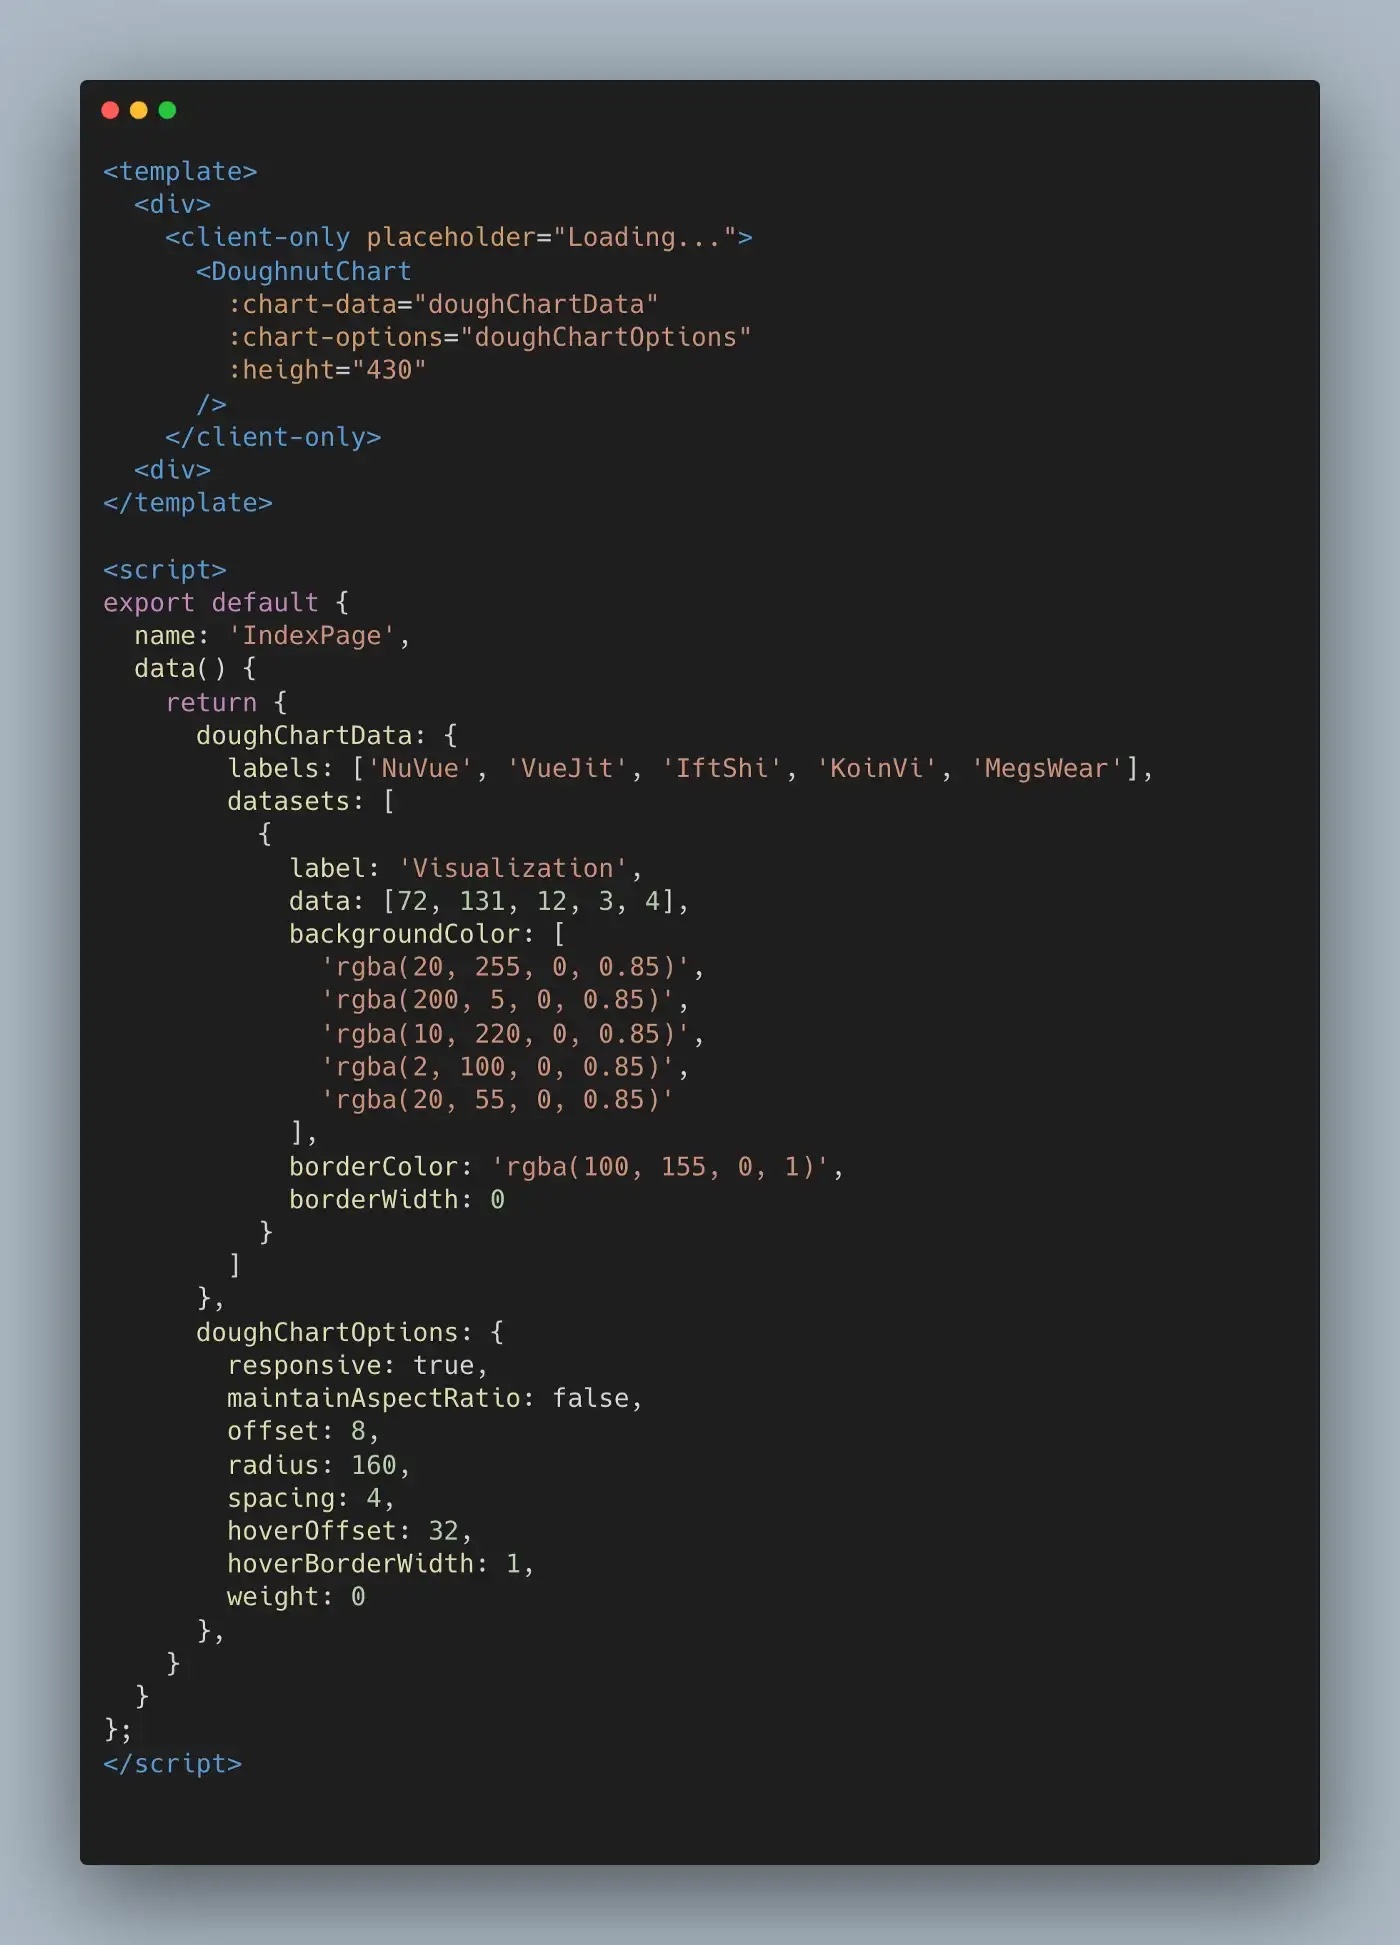
Using Chart.js in Nuxt.js pages or component:

You can use the Apex Charts in the pages or Nuxt.js components by writing the components name that I already explained above which are <DoughnutChart/>, <LineChart/>, <BarChart/>, and <PieChart/>.
You can see the demo for this writing on adding plugins to the Nuxt.js web application. Here is the source code link. I hope this will help you with integrating plugins into your Nuxt.js web application project.


